Most of you know about Period Correctness, but if you've been following me on Facebook, you also know that I haven't been posting much. It would seem that I haven't had much business, but thankfully, it's quite the opposite! Period Correctness has been getting lots of orders this summer!
Last night I cut out pieces for mid 1800's civilian trousers, and a man's shirt. Plus, there are several other orders on the waiting list!
Make sure you check out the Facebook page, follow us, and share with your friends! There are some new and exciting plans in the works for Period Correctness, and you'll want to catch the latest news!
Showing posts with label Living History. Show all posts
Friday, July 11, 2014
Tuesday, July 1, 2014
{Works With Her Hands} - 1830's/1840's Dress
Every spring and fall at Genesee Country Village, we put on special Hosmer's Inn Dinners. If you've never heard of them, or never gone to them, I would definitely recommend checking them out! Anyways, I usually get the play the hostess (A.K.A. Mrs. Hosmer), and this year I decided that I would like to make a dress of my own for this role.
However, there was the trouble of buying fabric again. Thankfully, I have awesome friends who also do historic sewing and who are always willing to pare down their fabric stash. I got the fabric for this dress from a friend in exchange for doing some sewing for her.
Both of my inspiration dresses are from the Victoria and Albert Museum. They are late 30's, early 40's. I wanted the bodice and upper sleeves of the first dress, but the lower sleeves of the second dress.
Thankfully, I had help from an expertise seamstress at the museum. She helped me drape the bodice, and pointed me in the direction of some great tutorials for the rest. Koshka The Cat was my main source of help. I used her 1840's Daydress as a guide for the sleeves, and the 1855 Ball Gown for the bertha. I sewed the bodice entirely by hand, which considering that every single stinkin' seamed is piped, was so easy feat! But, I got the dress done the morning of my first Hosmer's Diner, and it was a grand success!
I didn't get around to taking pictures of it that night, though, so here are some pictures from the Celtic Faire at the museum this past weekend.
However, there was the trouble of buying fabric again. Thankfully, I have awesome friends who also do historic sewing and who are always willing to pare down their fabric stash. I got the fabric for this dress from a friend in exchange for doing some sewing for her.
Both of my inspiration dresses are from the Victoria and Albert Museum. They are late 30's, early 40's. I wanted the bodice and upper sleeves of the first dress, but the lower sleeves of the second dress.
Thankfully, I had help from an expertise seamstress at the museum. She helped me drape the bodice, and pointed me in the direction of some great tutorials for the rest. Koshka The Cat was my main source of help. I used her 1840's Daydress as a guide for the sleeves, and the 1855 Ball Gown for the bertha. I sewed the bodice entirely by hand, which considering that every single stinkin' seamed is piped, was so easy feat! But, I got the dress done the morning of my first Hosmer's Diner, and it was a grand success!
I didn't get around to taking pictures of it that night, though, so here are some pictures from the Celtic Faire at the museum this past weekend.
Thursday, February 27, 2014
{Works With Her Hands} The Making Of A Kirtle
This year, I am participating in a sewing challenge, called Historical Sew Fornightly. The challenge I chose to do this month was called "Under It All". So, I decided to sew an early medieval kirtle, or under dress.
I decided to do this for two main reasons. #1 - These dresses are beautiful, and I've seen many wonderful examples from other people in the sewing group. #2 - I thought it would be a great chance to learn new techniques.
What made this dress so different from other dresses that I have made is that it is a bust-supporting garment; that is to say, you don't wear a corset underneath like I do with my 1800's dresses. Instead, it is the fit and shape of the dress itself that provides the support. The other big learning curve is that for the most part these dresses are draped instead of cut from a pattern. This means that I created my own pattern by laying scrap fabric on myself and pinning till it fit correctly.
This was the first time I tried to drape my own pattern, and it was quite the challenge! It probably took me four tries, but I finally managed to get this:
Next, I used those pattern pieces to cut out the dress. This was the scariest part of the whole thing! Usually I don't flinch about cutting into the real fabric, but this time I was terrified, since I really didn't know if it was all going to work.
One of the coolest parts for me was learning about how to draft the sleeve. I've always had issues with sleeves on dresses I sew. Either the sleeves lay perfectly but restrict all movement, or they allow for free movement but have lots of ugly wrinkles. I never understood what the problem was or how to fix it, but researching how to draft a sleeve pattern explained all that! Apparently it has to do with the ratio between the measurement of your bicep and your armscye. Either way, this is the silliest looking sleeve pattern I've seen....but it works!
The actual process of sewing all the pieces together was very easy. It consists of two front pieces, two back pieces, and four skirt gores. I flat-felled all the seams, and did some basic facings for the sleeve and neckline hems. The sleeves button part-way up. The style of button used then is a self-stuffed fabric button. I made 24 of these, sewed them all onto the dress, and then had to do all the button holes!
The front laces up, so I also had to sew all the eyelets.
And here, finally, is the finished kirtle!
I'm very happy with how it turned out, and I'm so glad that I chose to do this project, because I learned a lot. Next in the making is a cotte, or over-dress to go with this.
And, the info for HSF:
What the items is: Medieval kirtle
The Challenge: #4 - Under It All
Fabric: 70/30 Linen/cotton blend
Pattern: my own, drafted using tutorials on Cotte Le Simple
Year: 1300s (?)
Notions: Thread
How historically accurate is it? About as much as time, money, and practicality allow. Since I won't be using this much, cut some corners, like blended fabric and sewing machine.
Hours to complete: Maybe 30, spread out over several days.
First worn: For the pictures, and just for fun the rest of the day around the house!
Total cost: $25 for fabric and thread.
I decided to do this for two main reasons. #1 - These dresses are beautiful, and I've seen many wonderful examples from other people in the sewing group. #2 - I thought it would be a great chance to learn new techniques.
What made this dress so different from other dresses that I have made is that it is a bust-supporting garment; that is to say, you don't wear a corset underneath like I do with my 1800's dresses. Instead, it is the fit and shape of the dress itself that provides the support. The other big learning curve is that for the most part these dresses are draped instead of cut from a pattern. This means that I created my own pattern by laying scrap fabric on myself and pinning till it fit correctly.
This was the first time I tried to drape my own pattern, and it was quite the challenge! It probably took me four tries, but I finally managed to get this:
Next, I used those pattern pieces to cut out the dress. This was the scariest part of the whole thing! Usually I don't flinch about cutting into the real fabric, but this time I was terrified, since I really didn't know if it was all going to work.
One of the coolest parts for me was learning about how to draft the sleeve. I've always had issues with sleeves on dresses I sew. Either the sleeves lay perfectly but restrict all movement, or they allow for free movement but have lots of ugly wrinkles. I never understood what the problem was or how to fix it, but researching how to draft a sleeve pattern explained all that! Apparently it has to do with the ratio between the measurement of your bicep and your armscye. Either way, this is the silliest looking sleeve pattern I've seen....but it works!
The actual process of sewing all the pieces together was very easy. It consists of two front pieces, two back pieces, and four skirt gores. I flat-felled all the seams, and did some basic facings for the sleeve and neckline hems. The sleeves button part-way up. The style of button used then is a self-stuffed fabric button. I made 24 of these, sewed them all onto the dress, and then had to do all the button holes!
The front laces up, so I also had to sew all the eyelets.
And here, finally, is the finished kirtle!
I'm very happy with how it turned out, and I'm so glad that I chose to do this project, because I learned a lot. Next in the making is a cotte, or over-dress to go with this.
And, the info for HSF:
What the items is: Medieval kirtle
The Challenge: #4 - Under It All
Fabric: 70/30 Linen/cotton blend
Pattern: my own, drafted using tutorials on Cotte Le Simple
Year: 1300s (?)
Notions: Thread
How historically accurate is it? About as much as time, money, and practicality allow. Since I won't be using this much, cut some corners, like blended fabric and sewing machine.
Hours to complete: Maybe 30, spread out over several days.
First worn: For the pictures, and just for fun the rest of the day around the house!
Total cost: $25 for fabric and thread.
Saturday, November 23, 2013
{Living History} - Fabric Giveaway!
Anna Worden Bauersmith is a beautiful re-enacting friend, an amazingly talented seamstress, and the author of the book Fanciful Utility; and now, she is having a give-away!
I have only had a few chances to talk with Anna, but every time I do she has such great bits of knowledge and new ideas to share. Her sewing work and outfits are all exceptionally beautiful and incredibly authentic. She has done so much research, and we all get to benefit from it! So, if you're into sewing and period reproduction fabrics, head on over to her blog and enter the give-away!
Saturday, June 15, 2013
{Living History} Lain's Mill, Canisteo
It's that wonderful time of year again -- re-enacting season! Last weekend, Stephen and I kicked off our season by attending the Lain's Mill Re-enactment in Canisteo, NY. Our decision to go was rather last minute, but I'm so glad that we did go!
I must admit that, overall, the event was rather unauthentic, or what re-enactors call "farby". It was small, with all of two sutlers (shops). But, the location was beautiful, the battles were fantastic, it was a fun time with friends, and it gave Stephen and I a chance to prepare for Gettysburg in July.
Anyways, enough of my ramblings. Here are some pictures!
Saturday morning:
Our little"kitchen":
The morning battle:
Here come my rebels!
Stephen's regiment near the end of the second battle, after they had been fighting in the woods:
Sunday morning, with a lake of fog covering the town of Canisteo in the valley:
Cooking breakfast:
Sunday's battle: Pickett's Charge:
Stephen and some of his regiment making it to the fence for hand-to-hand combat:
I must admit that, overall, the event was rather unauthentic, or what re-enactors call "farby". It was small, with all of two sutlers (shops). But, the location was beautiful, the battles were fantastic, it was a fun time with friends, and it gave Stephen and I a chance to prepare for Gettysburg in July.
Anyways, enough of my ramblings. Here are some pictures!
Saturday morning:
Our little"kitchen":
The morning battle:
Here come my rebels!
Stephen's regiment near the end of the second battle, after they had been fighting in the woods:
Sunday morning, with a lake of fog covering the town of Canisteo in the valley:
Cooking breakfast:
Sunday's battle: Pickett's Charge:
Stephen and some of his regiment making it to the fence for hand-to-hand combat:
Thursday, December 20, 2012
The Most Wonderful Time Of The Year!
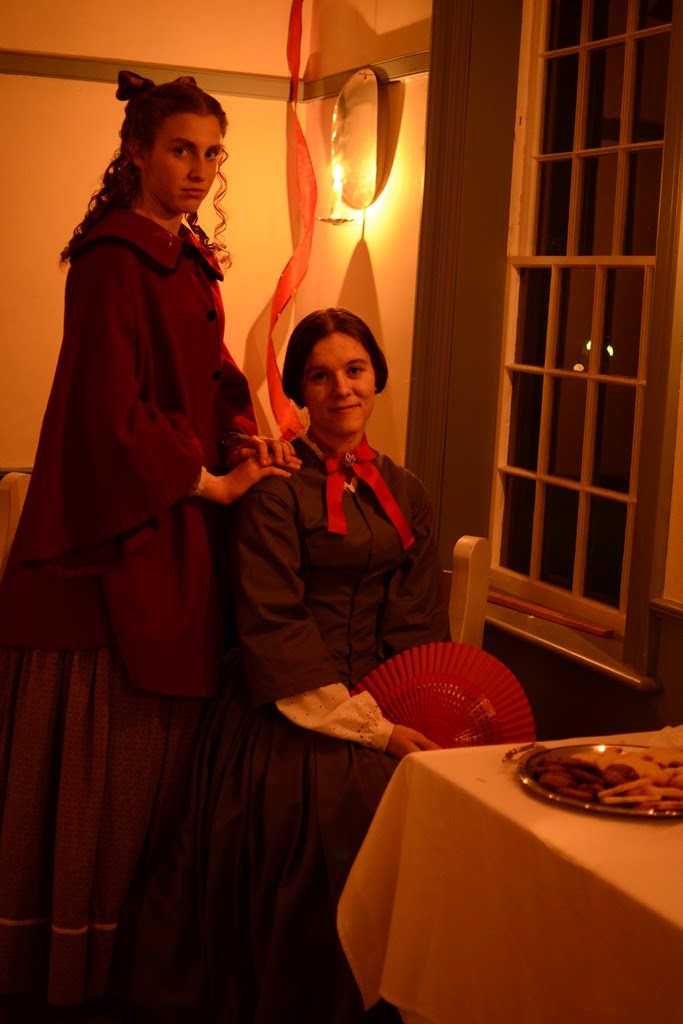
With less than a week left until Christmas, I just had to post my annual blog of Yuletide pictures! This year the program was set in 1849, the year when New York made Christmas an official holiday. For us ladies, doing 1849 meant new dresses and new hairstyles; I took the opportunity to replicate my favorite Jane Eyre dress. Unfortunately, I don't have pictures from any of the other scenes...but here are some "back-stage" pictures to show the fun we have in the Town Hall!
Getting ready on opening night:
Lovely ladies:
Eyeing the "yummy" food....before it turned stale and moldy by week #3:
Awesome hairstyles on awesome girls:
Can't help but smile when he's near:
Straight out of a tintype:
Spinning ourselves silly:
Trying to orbit while we spin:
Monkeys!!!
Being silly:
Being sweet:
Waltzing loveliness:
What do you think.....the newest Rockettes???
Our fiddler, Jim:
Sweet girl:
This talented lady just light a match on her teeth!
I walked up and down those stairs about 70 times every weekend:
Trying to be Jane Eyre-ish......see the similarity?
"Little Blue Riding Hood":
I'm complete when he's by my side:
Feeling like a little girl:
Christmas-y decorations:
The official Town Hall Hair Salon:
A bunch of females all in one small room...can you say crazy??
The group waltzing:
Enjoying the view as the sun sets on the last day:
More in love with him than ever before:
And so ends Yuletide 2012!
Getting ready on opening night:
Lovely ladies:
Eyeing the "yummy" food....before it turned stale and moldy by week #3:
Awesome hairstyles on awesome girls:
Can't help but smile when he's near:
Straight out of a tintype:
Spinning ourselves silly:
Trying to orbit while we spin:
Monkeys!!!
Loving the shape of my new dress:
Being silly:
Being sweet:
Waltzing loveliness:
What do you think.....the newest Rockettes???
Our fiddler, Jim:
Sweet girl:
This talented lady just light a match on her teeth!
I walked up and down those stairs about 70 times every weekend:
Trying to be Jane Eyre-ish......see the similarity?
"Little Blue Riding Hood":
I'm complete when he's by my side:
Feeling like a little girl:
Christmas-y decorations:
The official Town Hall Hair Salon:
A bunch of females all in one small room...can you say crazy??
The group waltzing:
Enjoying the view as the sun sets on the last day:
More in love with him than ever before:
And so ends Yuletide 2012!
Subscribe to:
Posts (Atom)